We had a question from a MetaSlider Pro user who wondered about the different types of navigation available for their slideshows.
In MetaSlider Free, the default option is “Dots“. This will provide large dots that visitors can use to navigate through your slideshow. This screenshot below shows the “Dots” option. You can install this same setup by going to the “Quick Start” screen and choosing “Image Slideshow”.

This next screenshots shows the “Dots” option with with a vertical alignment. A slideshow like this may have other navigation tools such as the arrows you can see here.

If you’re using MetaSlider Pro, you’ll have two more options available: “Thumbnails” and “Filmstrip“. In this guide, I’ll explain more about those two alternatives.
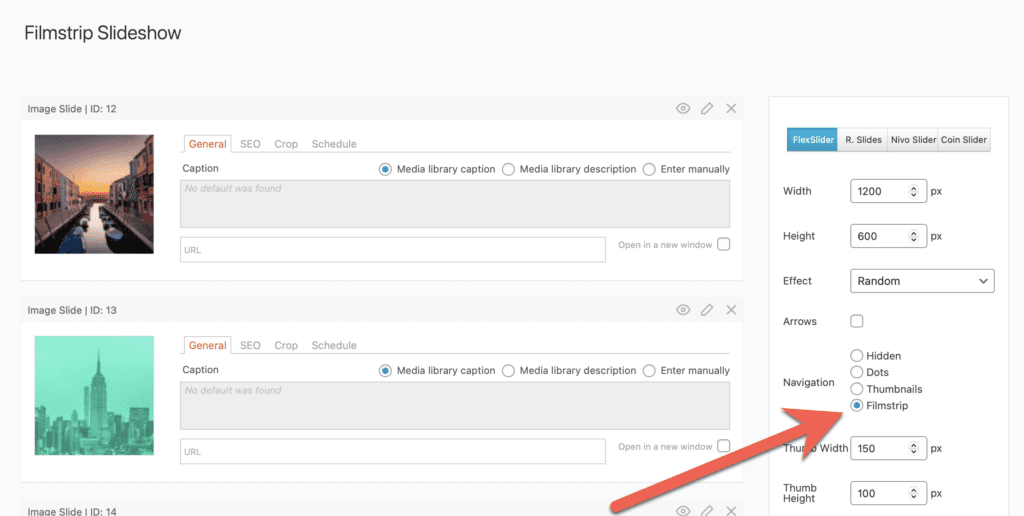
Table of Contents for this post
How to Use the Thumbnails Navigation
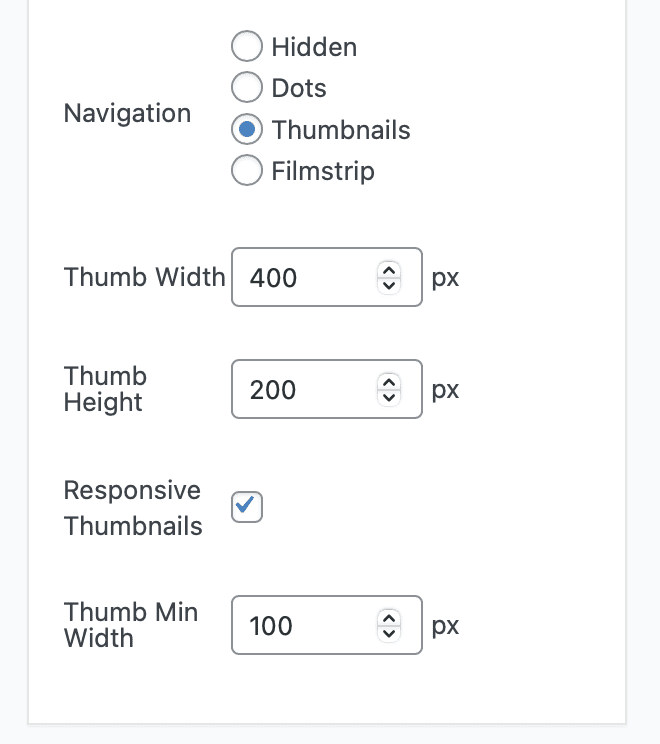
This screenshot below shows what happens if you choose the “Thumbnails” navigation option. Each main slide is also displayed in thumbnail form under the main slideshow. This choice is ideal if you have four or five slides in your slideshow.

You can configure settings for these thumbnails inside MetaSlider. My advice would be to make sure the “Thumb Width” is wide enough to cover the main slideshow. So if your main slideshow has a width of 1200px, and you have four slides, then the “Thumb Width” should be at least 300px.
How to Use the Filmstrip Navigation
This next screenshot below shows what happens if you choose the “Filmstrip” navigation option. This is is very similar to the “Thumbnails” option but there are also forward and back arrows on the thumbnails. This makes “Filmstrip” a good choice if you have a lot of slides in your slideshow.

My recommendation for the “Filmstrip” option is to set a relatively small “Thumb Height”. This will increase the filmstrip-style appearance of the navigation. The size of the arrows will vary with your theme. This example below uses the “Bubble” theme and the arrows are much larger than the default: